Custom Puzzle Ring
"Yes" can be a dangerous response. A great customer of ours came through the doors and asked, "What kind of custom things can you do?" My response, "I can make just about anything." That's where the entanglement started. The project he had in mind was a Celtic Knot with particular sentimental value to him. He wanted four different bands made with four different materials, green gold, rose gold, white gold, and yellow gold, all connected together that would intertwine to become a Celtic Knot. This began a creative design journey in unfamiliar territory.
Among our specialties at RUMMELL is custom Computer Aided Design (CAD). A puzzle ring is a ring made up of multiple bands all connected to one another. When “solved” they create a specific design. So, we started with the design:

The design was pretty straight forward, or so I thought. On the first draft I did the CAD and 3D model just as it looks. The problems showed up pretty clearly when I 3D printed the first model and started to look at the geometry. This initial design wouldn’t allow the parts to interlock. I like to work with the models laid out flat because it's easier to control the design. It took some real thought and manipulation to make sure that none of the parts intersected one another. Even though it might look good in the CAD version, if it had intersecting parts the real thing wouldn’t fit together right. Here is what I came up with:

After getting the geometry right on a flat plane, I bent it into a ring shape:

This looked good. On to the 3D printing. Each of the four bands had to be individually printed, and then assembled to make sure the puzzle would work prior to casting. In the second draft there were a couple of issues, so I went back into the CAD and fixed the problem parts. The third go around worked nicely, so we proceeded to casting. Here is what the waxes looked like:

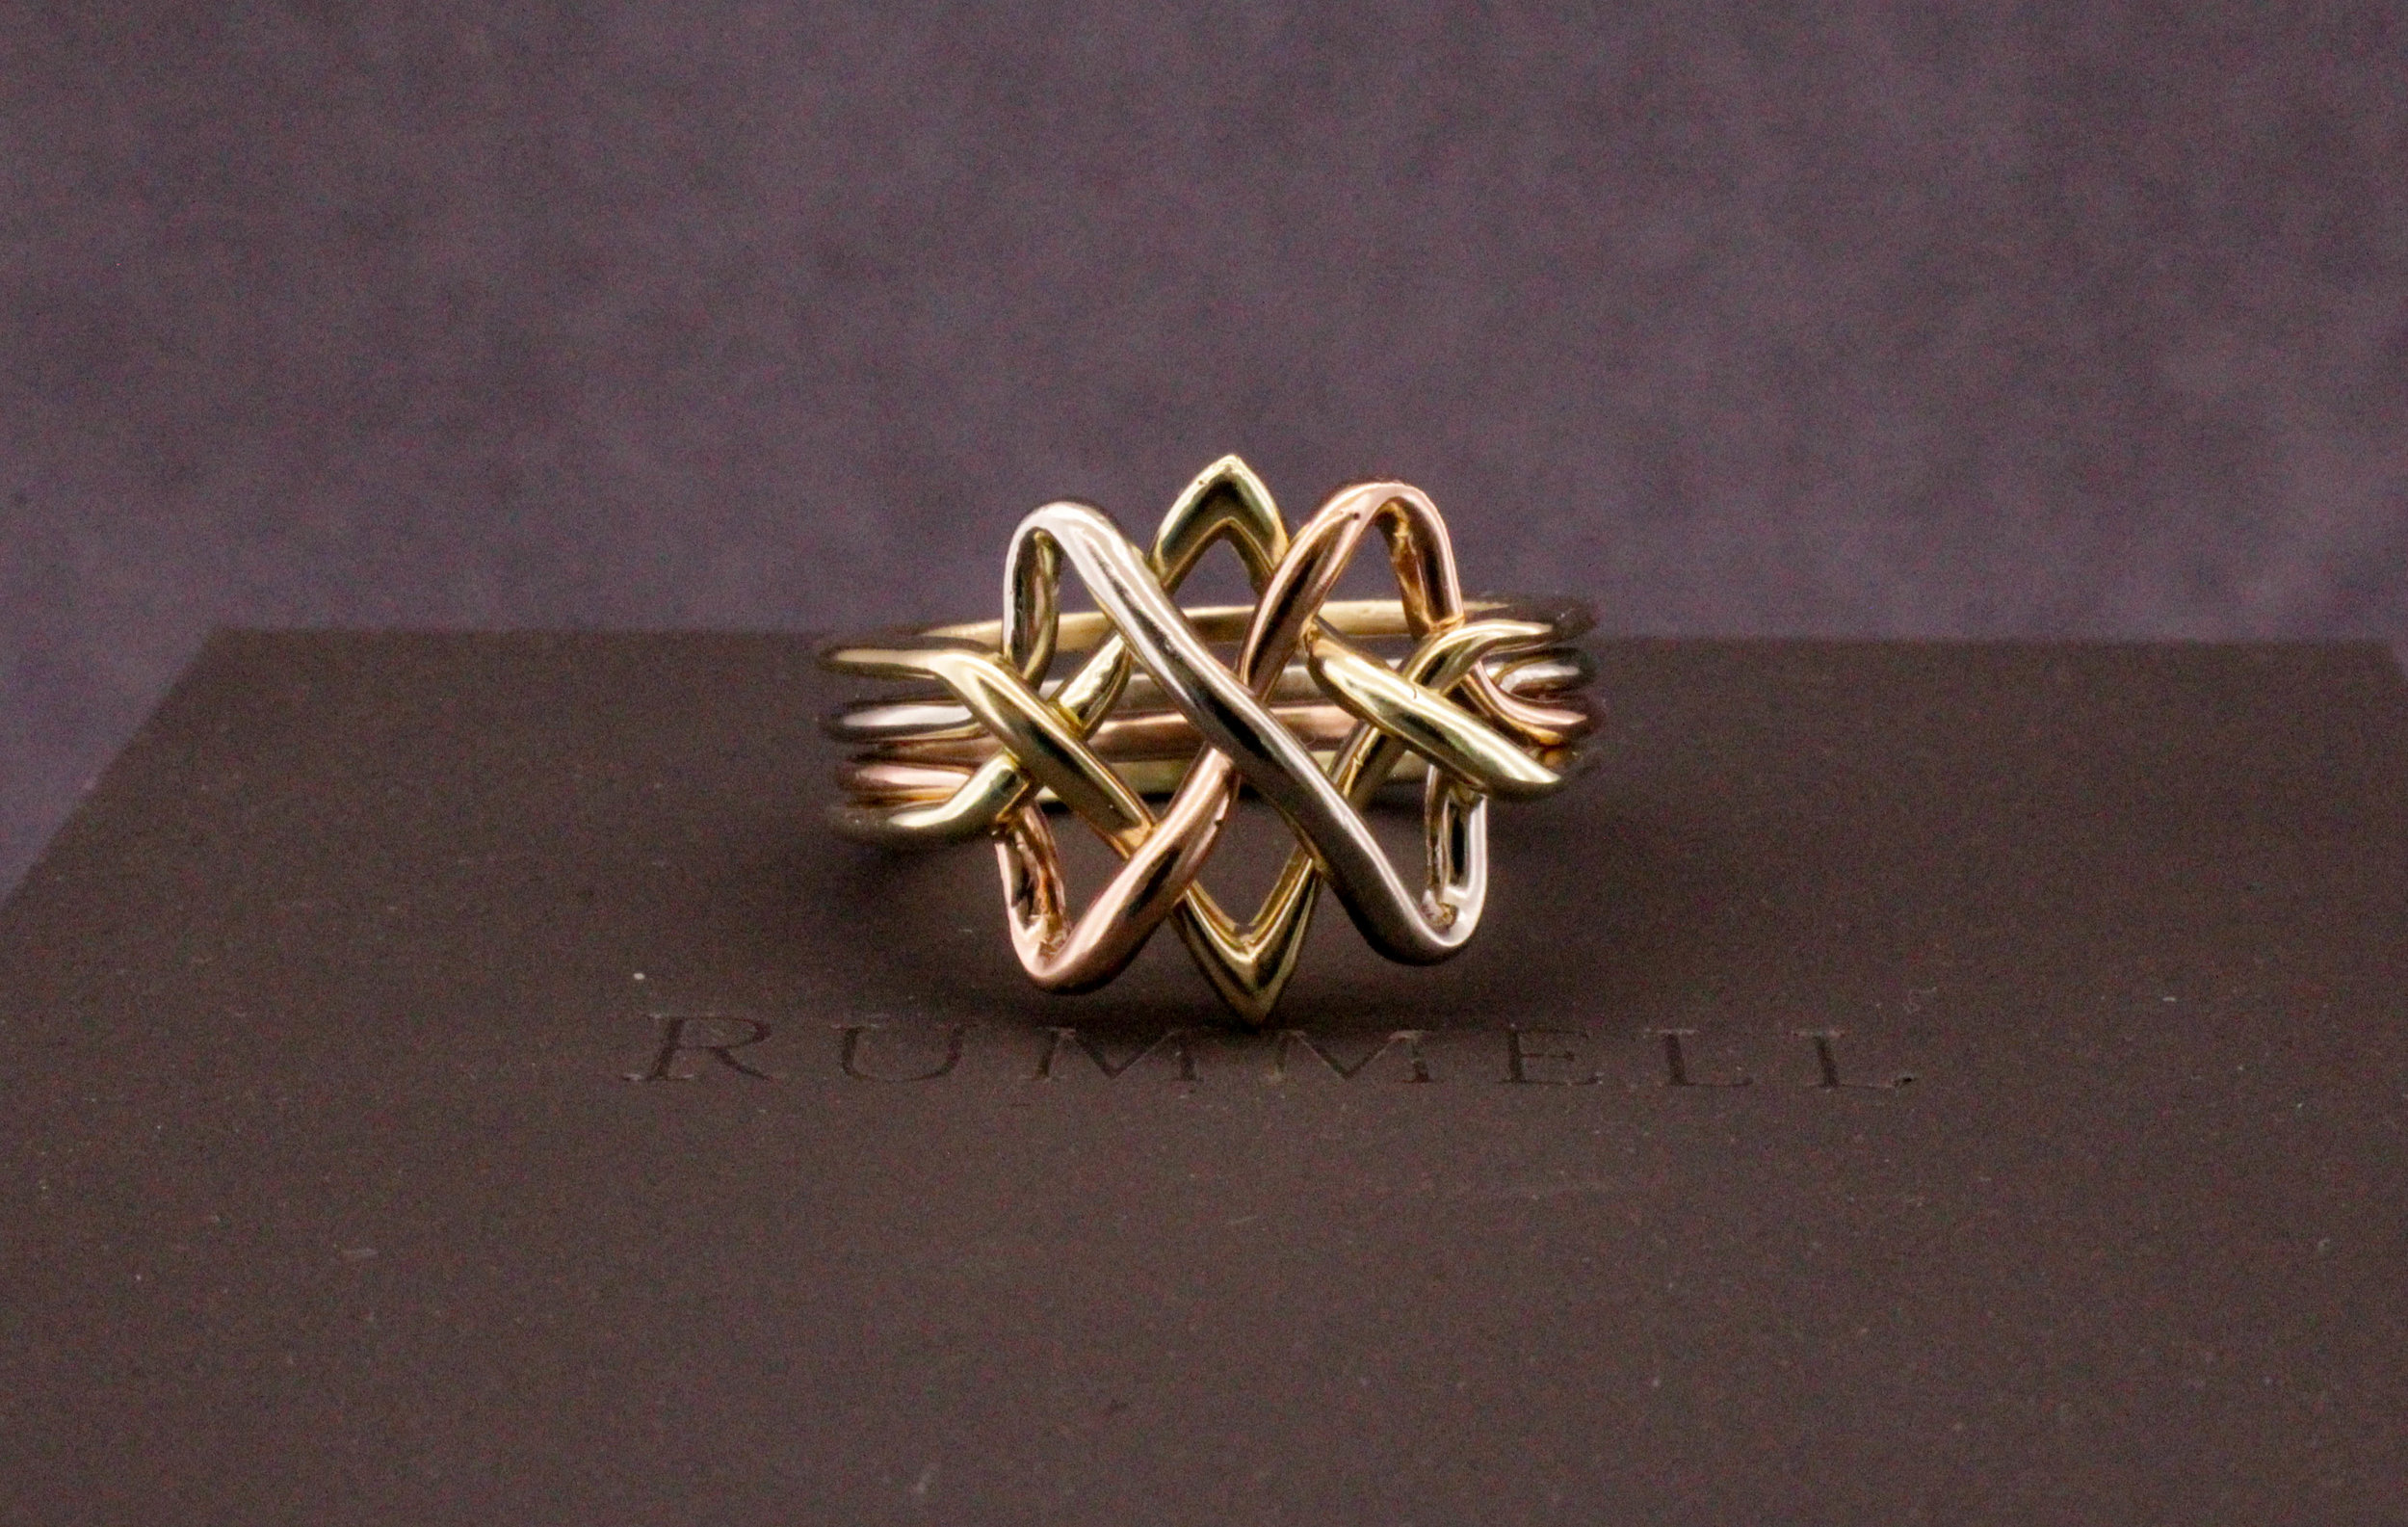
I took the waxes and then cast them individually into their appropriate metal: 14k Green Gold, 14k Yellow Gold, 14k White Gold, and 14k Rose Gold. The final step was to polish all of the pieces after casting, then cut the bottoms to assemble the rings together, then to find out what the “solution” to the puzzle was. Here are the rings all put together, but not “solved.”

It took another hour or two to come up with the solution for the ring, but I figured it out and carefully documented how it all worked. There is only one “solution” for this ring and if not assembled in just the right steps, it doesn’t work.

This was a fascinating project. It was really a nice challenge and change of pace from strictly a design perspective. I hope you enjoyed the synopsis of this project. I’d love to work on your next project, whether a more traditional ring/pendant/earrings, or something totally unique to you.